Monday, 1 May 2017

Card-io Stamps - Birthday card

Hello Blog Readers

It has once again been a long time since my last post.

I read quite a few blogs, some of them post every now and again (like me) some every few days and one, which I always read, posts on her blog every single day - Barbara Gray - baragrayblog.blogspot.co.uk.  I really enjoy reading her blogs, most have projects to try and some are about her private life.  It just amazes me that she can and has blogged every single day, since October 2013.

Anyway, here is my little blog post...I craft with a few friends, and we meet up on a Wednesday night to craft -well maybe I should correct that - we catch up and chat for the first half hour or so, then we start to craft.  We sometimes all do a project together, and other nights we bring something we are working on and want to get finished.

A few months ago Jenny, one of my craft friends,  made a card using Card-io stamps.  Well I was so surprised with how quickly you could make a card, I got myself some of the stamps.  It has also made me get all my Clarity stamps out of storage and started to use them again.

Here is a selection of the cards I have made so far....


A Birthday card for a friend.


With the following cards I stamped the envelopes with the same colour and flowers as the card.


Blues


Yellows


Pink/Lilac with birds


Pink and Lilac with Wellies

Hope you've enjoyed looking in, I have some more to show which I will hopefully post in the next couple of days.
Let me know what you think.
bye for now x


Saturday, 3 September 2016

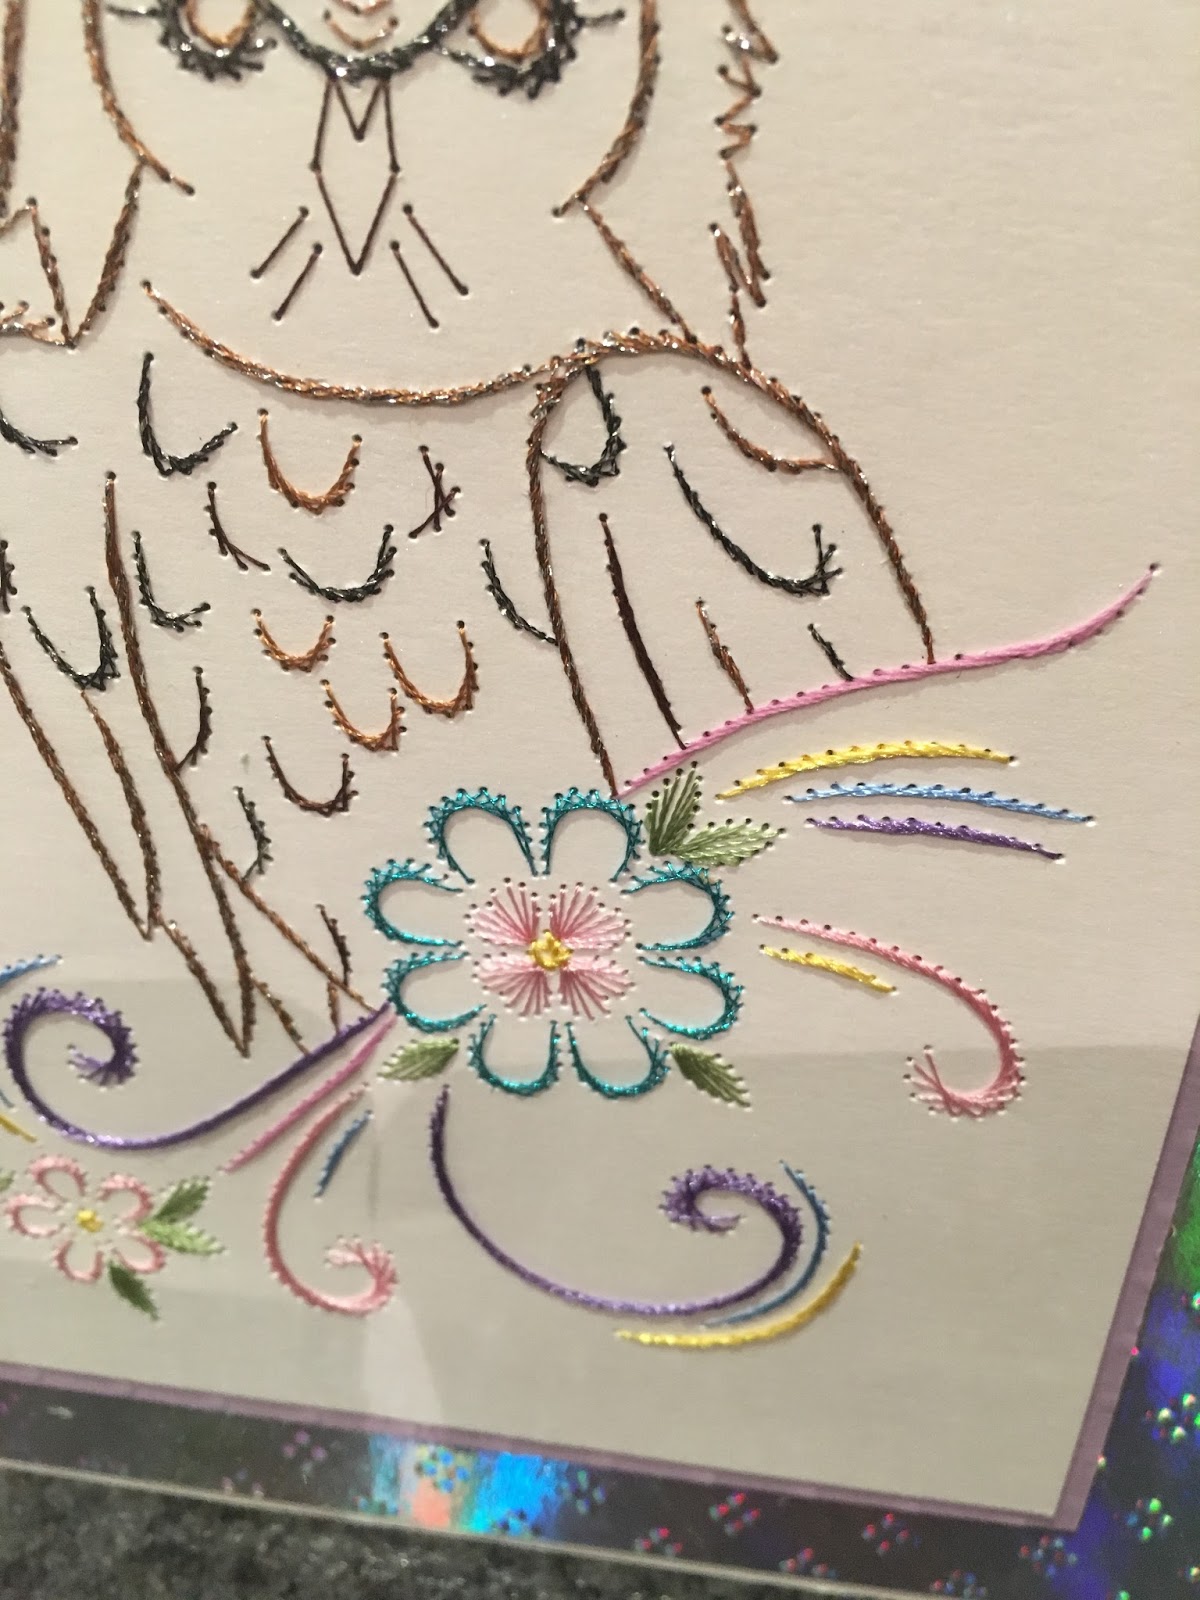
Stitched Pattered Greeting Cards


Hello All Blog Readers,  Thank you for stopping by.

Well here we are in the month of September!  I'm not sure where the time is going, the year is whizzing by.

Today I thought I would show you some cards I have stitched.  

I tend to make a few of these at a time.  I normally just stitch a pattern but not make it into a card (which is why I mainly stitch onto white card), until I know who it will be for or for what occasion.  The ones I am showing here are all birthday cards, but some are for special birthdays.


Depending on the stitched pattern of the card, I sometimes colour in between the stitching to highlight the picture.  In this card, I thought it looked better with the rose, leaves, quill feather and ink well coloured.  I used pencils for this.


I did not colour this card.  I had used some thicker threads for the owl, so felt this was all it needed.


However, this card I thought need a bit of colouring, but kept it light.


I hope you've enjoyed looking through some of my stitched cards.  If anyone would like to know where I got the patterns from or which dies I used to mount the card onto, just leave me a comment and will let you know.

Enjoy your weekend
Sally x

Friday, 26 August 2016

Birthday Bike cards

 Hello Blog Readers,

Thank you for stopping by.
Today I thought I would show you 2 cards I made for my Sons birthday.  As you will guess from the theme of the 2 cards, he loves to ride his bikes, so much so, that he is going to be cycling from
Lands End to John O'Groats over 9 days, in September.

Anyway, back to the card,  The bike die is a signature die by Joanna Sheen.  I made the first card to look like a shop front window, the letters and birthday sentiments are dies from Robert Addams.


 I cut strips of thin brown card and taped them to some acetate which I curved to give a bowed window effect.


I then had a request from my daughter-in-law asking for me to make a card from her.  I used the same bike die but I cut it twice, once in grey and then in black.  I then cut up the black bike and just used some parts to highlight the tyres, seat, handlebars and water bottle.


I cut up an old road map to use for the background and to make a mini road map.
My daughter-in-law was very happy with the end product.


Thank you again for popping by, please leave a comment, it is nice to know who looks in.

Enjoy your bank holiday weekend x
Sally x

Monday, 15 August 2016

Hello Bloggers,

Thank you for looking in.  Well it is only 5 days since my last posting,  that's not bad, seen as it was 2 years prior to that...lol x

Well I had a busy few days,  my partner (Neil) has a brother who was 70 at the weekend.  He had a big family gathering for lunch on Sunday in Bristol.  Lovely hotel and a lovely lunch, until it came to us leaving at 5pm, only to find the police had closed the roads (including the carpark where our car was parked) in and around the centre of Bristol, because of a suspicious car which had be illegally parked outside the police station.  So we had to wait for the bomb disposal crew to deal with the car before the roads were re opened, at 7:30pm...Neil's brother will certainly remember his 70th.

Anyway back to crafting. Neil asked me to make his brother a card, which had to included a picture of a class 70 train (both brothers are train mad)!

I decided to make the card with a champagne bottle on, the card was an A4 size card, which is a size I don't normally make.  The label has the picture of the train (70 class, as requested) and the rest of the labelling has his age and name.

 The bottle shape was from an old template I have had for a few years but never used...I knew it would come in handy one day.


I have more cards to make, I think  I will make some stitched cards, so look in again to see what I have done.

bye x

Wednesday, 10 August 2016

Hello Bloggers,

Well here I am, back after a 2 year break from blogging.  I just hope I can remember how to upload picture etc.
Although I haven't been blogging, I have still been crafting and have even started a new craft,  Groovi Parching. These are plates which are made by Barbara Grays company Clarity Stamps.
Although some true parchment crafters say this is not true parchment, I have to say I think it has revived the art of parchment.

Here are a couple of my makes so far.


Hope you like them.   I have promised myself to blog at least once a week.  Hope you will take a look again soon.
x

Sunday, 10 August 2014

Scrapbooking - Old photos

Hello Blog Readers

Today I thought I would show you my first ever scrapbook page. Earlier this year  Christine  Emberson ran a class introducing scrapbooking to new comers.  I enjoy my papercraft, making cards, boxes etc but I had never tried scrapbooking.  So, as I have tons of photos, I thought I would try scrapbooking.

Christine was so good explaining how to pick out colours from your pictures, to decorate your page.  Also how to draw the line to the picture/s you want the viewer to see or notice.

I picked some pictures of my three children, which they had taken at school 25 + years ago.


I used a variety of Spellbinder dies, for the flowers, leaves and butterflies.


I was very pleased with my first attempt, I really enjoyed making this and so, I have decided that I must make some more.

Let me know what you think.

Take care x Sally

Thursday, 17 July 2014

Poster for a Temple

Hello Bloggers.  

My future Daughter-in-law (Vandi), asked me if I could help her make a poster for her Temple.  Vandi brought me a copy of one they had before which was a photo copy of flowers.  So I thought it would be nice to have a 3D poster and set about making quite a lot of flowers.  The post was A3 in size. The literal translation is "worship of the guru". Guru means 'master" and in this instance is being used to refer to god as the master.


 I used the following Dies:-
Spellbinders Dies- 
Anemone Flower Topper
Rose Creations
Gold Elements - The four corners
Sprigs
Les Papillion - butterflies
Jewels & Flourishes - small butterfly
Heartfelt Creations die-
Delicate Asters
Gems - from my stash
I cut the letters using my cricut machine - I have had my machine for quite a few years and only used it about three or four times, because I love my Grand Calibre.

Thank you for stopping by xx Sally


Sunday, 13 July 2014

Little Birds - Stamping & Colouring


Hello Blog Readers

Yesterday I went into my craft room, with all the good intentions of giving it a good sort out but I got side tracked and ended up making these two cards instead.

The first card,  I have used the following items:

Large Blue Tit - Clarity stamp
Small Blue Tits - Clarity stamp
Bird Feeder - Clarity stamp
Tree Branch - Clarity stamp
White card - I used Clairty Stamps 'Theuva card'
You can also buy the masks from Clarity Stamps for the blue tits, which saves a lot of cutting out, as you can use them over and over again.   http://www.claritystamp.co.uk

To stamp the images I used Archival ink pad - Jet Black.
To colour back ground I used Adirondack ink pad - Meadow, Lettuce and Stonewash
Christine Emberson sells these and other ink pads in her shop and on her website http://hopeandchances.co.uk/product-category/inky-stuff/

To colour in the birds I used Spectrum Noir colouring pencils and a silver 'Sharpie' pen for the wire on the feeder.

I mounted the card onto some green paper I had in my stash.


For the second card I used the following 
Square image from Imagination Crafts Decoupage Stamp Set - Birdhouse - The set comes with a little branch, which I used to stamp around the card. 
Spectrum Noir colouring pencils
Adirondack ink pad - stonewash
Stencil brush to give a hint of blue in the back ground.  
Again, I mounted the card onto some green paper, which I already had in my stash.


And so the craft room was not sorted - maybe one day - but I enjoyed making these cards.

Hope you  like them, come by again soon
Sally x

Monday, 7 July 2014

Leather Effect Birthday Card Wallet

Hello Blog Readers, 

I thought I would share with you a birthday card I made for my Son.  I got the idea from Christine Emberson's blog, which is hope-chances.blogspot.co.uk.  Christine featured Angela Dobson blog, (Angela is on the Papermill Direct design team), where she showed some cards she made using Papermill Directs leather effect card.  

The Leather effect card comes in white and buff colour, which is the colour I used. Christine Emberson sells this card in her shop, in Gravesend, Kent.

I inked the edges of the card with Tim Holtz distress ink, to make the wallet looked used.


I covered the inside of the wallet with some paper I had in my stash, which matched nicely.
The "Happy Birthday' and the initials are Robert Addams dies. The verse is a stamp I have from Clarity Stamps

I cut some more leather effect card to make the pockets to hold the messages.  The message cards are cut with Spellbinders label dies.  As you will also see there are couple of stamps in one of the pockets.   I photo copied a small photo of my son and them used a 'postage stamp' stamp from Clarity stamps and cut out.

The last piece of card I cut was for the closure, I used a little piece of velcro, so it would close and a brown caddy dot.  To finish the look, I used a fine black marker around the edge of the wallet to look like stitching.

I think it made a nice male card, so I think I will be making a few more.
 Thank you for looking in. x

Monday, 2 June 2014

65th Birthday stitched steam train card

Hello Blog Readers

Well today I thought I would show you a card I made for my partners 65th Birthday.  
Neil loves trains, so I thought his birthday card should have a train on it.

The Train is a pattern from Form-A-Lines, I stitched the engine with a dark green thread and the carriages with a dark red thread, for the smoke I used a grey/silver and black/silver thread.  I used some peel off letters for Neil's name at the front of the train and numbers for his age on the side of the engine.

I then used a spellbinder label shape to cut around the train, which I then mounts onto dark red card, I trimmed both the white and red card with fine line peel offs - I have loads of peel offs, from when I first started crafting, which I don't really use anymore, so I need to use them up.


I cut some cogs and the words Happy Birthday I cut out of silver mirror board, using Robert Addams dies.  
I then mounted the stitched pattern onto some brick card and white industrial card, which I had in my stash.


Neil really liked his card, hope you do.
Back soon xx

Monday, 26 May 2014

Crafty time just flies by...


Hello Blog Readers,

I thought I would show you something I made using a very very cheap clock, which I bought from a 99p shop, so yes it cost just 99p.


I dismantled the clock and removed the cardboard clock face.  I used the cardboard clock face as a template for the base colour.  


First I cut the base paper and glued this in place using Cosmic Acrylic Glue.  I then cut a circle using one of the Spellbinders Grand Decorative Circles One, in plain cream paper.
The flowers and leaves are Spellbinders Delicate Asters, which I cut using plan and patterned paper, I then inked the edges with  distress ink and glues a gem in the centre of each flower.


The two large butterflies are Spellbinders, Les Papillions, with some gems glued along the body of the butterfly.  The two smaller butterflies are from Spellbinders, Jewel Flowers and Flourishes.  I also glued a piece of lace I had in my stash.


I then put the frame and glass back on, so this is it with a silver frame.


The next picture shows the clock picture with a pattern frame, which I have cut using Spellbinders Grand Decorative Circles One.  I haven't glued the frame in place yet, as I'm not sure if I like it with or without the frame.

Let me know why you think?


Thank you for stopping by and taking a look. x


Thursday, 8 May 2014

Flowery wooden butterfly plaque

Hello Blog Readers

I thought I would share with you a plaque that I have made.

The idea started when I attended a class at Christine Embersons shop - Hope & Chances Creativity - which is in Gravesend.  We decorated a heart shape plaque, this was how my one came out. 


 I was pleased with the result and so thought I would try to decorated another shape.  My friend Janice had bought some wooden butterfly plaques from Anna Marie Designs, you get three sizes, I picked the middle size one (6" x 83/4") to decorate.

Here is the list of the papers, dies and adhesives which I used:-

Paper - DCWV Paper pad - The letterpress stack.  
Dies - Spellbinders:- Rose Creations,  Jewel Flowers & Flourishes
           Robert Adams:- Alphabets
Adhesives:- Rangers:- Glue 'n' seal and Cosmic Shimmer, acrylic glue.
Tim Holtz Distress inks
Lace, gems and ribbon
Emery board

I used the wooden plaque to draw around the shape on the paper and cut out, I coated the wooden shape with the glue 'n' seal to adhere the base paper to the board, I then put this to one side to dry.

 I then cut out the flowers, leaves, butterflies and flourishes, I inked the edges of the flowers and leaves with distress ink, then curled the flowers into shape before layering them up to the size I wanted.
I then sanded the edge of the butterfly (with the emery board) using a downward motion, this gives the edge a very neat finish. Once I had been all around the edge, I used distress ink around the edge to soften the look of the edge.

I then glued the flowers, flourishes, little butterflies, lace and gems into place and tied the ribbon to hang the plaque.

I'm quite pleased with the end result.

I will be back again soon. Thank you for looking in. x